
Whether you are a beginner stepping into woodworking or a seasoned DIYer looking to speed up production, learning how to make pocket holes is one of the most effective ways to level up your craft. This guide covers everything you need to know about the pocket joint, from basic mechanics to step-by-step assembly.
What Is a Pocket Hole Joint?

A pocket hole joint (often referred to simply as a pocket joint) is a fast and efficient mechanical joinery method. It involves drilling an angled hole (typically at 15 degrees) into one workpiece, allowing a specialized self-tapping screw to drive directly into the mating piece. As the screw tightens, it pulls the two boards together, creating an instant, rigid connection.
Compared to traditional joinery methods that demand precise measuring, chiseling, or long clamping times, making a pocket hole joint is far more accessible. Because a dedicated pocket hole jig dictates the angle and depth, even novice woodworkers can achieve clean, dependable joints on their first try. While not designed for extreme twisting forces, it delivers impressive mechanical strength for cabinet frames, furniture carcasses, and general DIY builds.
Key Characteristics
| Feature | Description |
|---|---|
| Ease of Construction | High. Quick tool setup with almost no learning curve. |
| Joint Strength | High. Excellent tensile strength due to the screw's mechanical clamping force. |
| Versatility | High. Ideal for face frames, aprons, cabinet boxes, and rapid panel assembly. |
💡 Not Sure Which Joint to Use?
The Pocket Hole Joint is primarily a mechanical, screw-driven assembly method. See how it differs from traditional glued joinery:
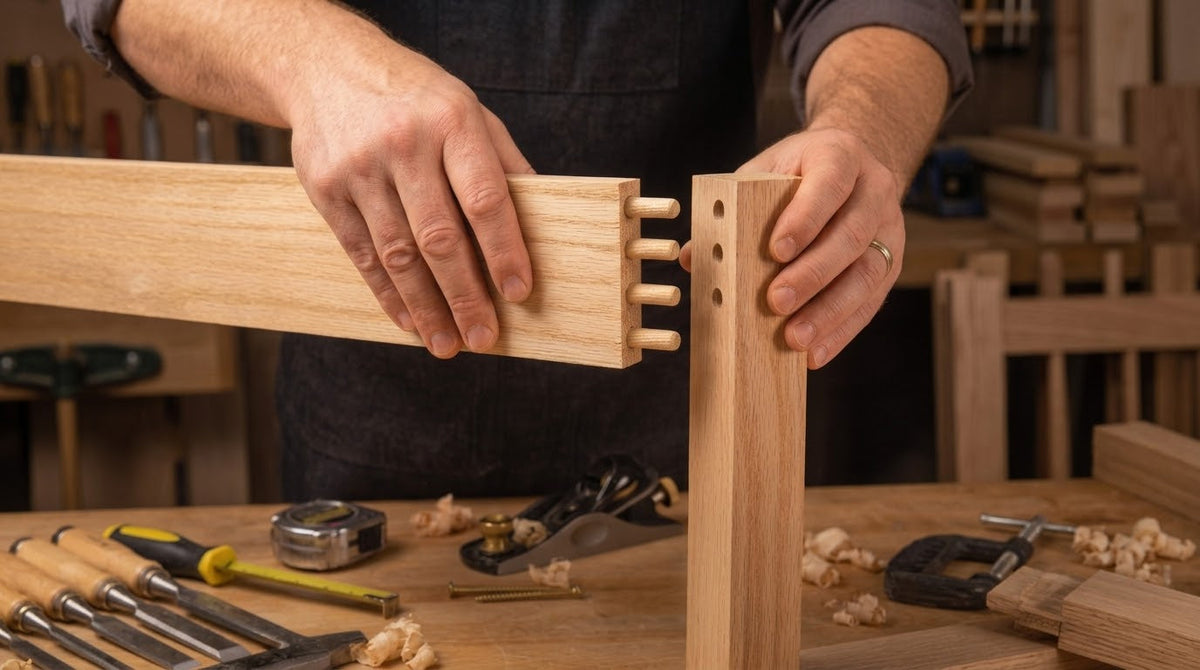
- Dowel Joint: Uses hidden wooden pegs for a completely invisible bond, but requires precise alignment and longer clamping times.
- Mortise and Tenon: A traditional interlocking joint offering superior structural strength for heavy furniture, though it requires significantly more time and skill to cut.
Pocket Hole Joint Advantages and Disadvantages
Advantages
✅ Fast Assembly: Instant mechanical hold eliminates waiting for glue to dry.
✅ Beginner-Friendly: Easy to learn with almost no learning curve.
✅ Minimal Clamping: Driving the screw pulls and holds the joint tightly together.
✅ Concealed Fasteners: Screws stay hidden on the back or underside for a clean surface finish.
Disadvantages
❌ Visible Pocket Holes: Left exposed, the angled holes require plugs or filler for a seamless look.
❌ Alignment Shift: Driving screws at an angle can cause boards to slip if not clamped securely.
❌ Dedicated Tools Needed: Requires a specialized jig, step drill bit, and pocket screws.
What Is a Pocket Hole Joint Used For?
Pocket hole joinery excels in applications where speed, efficiency, and strong mechanical hold are prioritized over traditional woodworking aesthetics:
Cabinet Face Frames
Quickly joining narrow stiles and rails without exposing fasteners on the front face.
Table Aprons and Legs
Securing cabinet skirts and table aprons directly to leg posts and tabletop undersides.
Cabinet Carcasses & Box Building
Fastening plywood sides, tops, and bottoms for kitchen cabinets, bookshelves, and drawers.
Rapid DIY Furniture Assembly
Building coffee tables, media consoles, and outdoor storage units efficiently.
Important Limitation: While versatile, pocket holes rely heavily on screw shear strength. For heavy structural components subject to extreme multidirectional leverage—such as chair legs or main house framing—traditional timber joinery remains the safer choice.
Common Types of Pocket Hole Applications
The versatility of the pocket hole joint makes it a go-to solution for various board orientations:
| Joint Type | Configuration | Ideal Project | Why Use It? |
|---|---|---|---|
| Face Frame Joint | Narrow boards joined end-to-face/edge | Kitchen cabinet fronts | Creates a flush, flat frame quickly without nail holes to fill. |
| Corner / Right-Angle | End of one board to the face of another | Cabinet carcasses, drawer boxes | Provides immediate clamping force for fast box construction. |
| Mitered Pocket Joint | Boards cut at matching angles (e.g., 45°) | Picture frames, decorative trim | Prevents mitered corners from sliding apart during assembly. |
| Panel Edge Joint | Boards placed side-by-side | Wide tabletops and workbench tops | Allows rapid edge-to-edge panel creation with instant mechanical pull. |
Pocket Holes vs. Traditional Joinery
Choosing between pocket holes, dowels, and a mortise & tenon system usually comes down to Speed vs. Aesthetics & Structural Rigidity.
| Method | Tool Cost | Production Speed | Mechanical Strength | Skill Level Needed |
|---|---|---|---|---|
| Pocket Hole Joint | Low to Moderate | Very Fast | High | Beginner |
| Dowel Joint | Low to Moderate | Moderate | High | Intermediate |
| Mortise & Tenon | Moderate to High | Slow | Maximum | Advanced |
-
Pocket Holes vs. Dowels: Pocket holes are significantly faster to assemble because the screw acts as an internal clamp. Dowels yield a completely hidden joint without visible pocket holes, but require accurate double-blind drilling and extended clamp time while glue sets.
-
Pocket Holes vs. Mortise & Tenon: Mortise and tenon joints provide unmatched structural integrity for heavy-duty furniture built to last generations. However, pocket hole joinery drastically reduces construction time and requires far less specialized machinery, making it ideal for modern cabinetry and everyday DIY projects.
How to Use a Pocket Hole Jig: A Step-by-Step Guide
Creating a strong, clean pocket joint requires a few basic tools and a straightforward setup.
Materials & Tools
- Pocket Hole Jig System: The core tool featuring hardened drill guides set at a 15-degree angle.
- Step Drill Bit & Stop Collar: A stepped bit that drills the pilot hole and screw shoulder simultaneously.
- Pocket Hole Screws: Self-tapping screws with a flat washer head (coarse or fine thread based on material).
- Face Clamps / Right-Angle Clamps: Essential to lock boards flush during driving.
- Drill / Driver & Long Driver Bit: For drilling holes and driving screws.
- Wood Glue (Optional but Recommended): Enhances long-term bond strength.
Step-by-Step Guide to Making Pocket Holes
Step 1. Measure Material and Adjust the Jig
Measure your board's exact thickness. Adjust the depth setting on your pocket hole jig to match this measurement. Next, set the stop collar on your step drill bit using the jig's built-in gauge and lock it securely with an Allen key.
Step 2. Clamp the Board and Drill
Insert the workpiece into the jig, aligning the target hole locations. Lock the jig clamp tightly. Insert your step drill bit into your drill, bring the drill to full speed before touching the wood, and plunge smoothly into the guide sleeve until the stop collar meets the jig rim. Back the bit out once or twice to clear wood chips.
Step 3. Prep the Joint and Apply Glue
Remove the board from the jig and clean away any loose wood fibers around the pocket entry. Apply a thin, even coat of wood glue to the mating end grain or edge of the board.
Step 4. Clamp the Joint Flat (Prevent Shift)
Position the mating board against the piece with the pocket holes. Crucial: Attach a face clamp directly across the joint line so that one pad sits on the face of each board. This keeps the boards flush and prevents them from shifting out of alignment as the screw enters at an angle.
Step 5. Drive the Screws
Insert a pocket hole screw onto your long driver bit. Place the screw into the pocket hole and drive it at medium speed with steady forward pressure until the washer head seats firmly against the pocket bottom. Do not over-tighten, as this can strip the threads in softer woods.
Pro-Tips for Perfect Pocket Holes
- Match Screw Length to Material Thickness: Always select screw lengths based on stock thickness to prevent the screw tip from poking through the face of your workpiece.
| Material Thickness | Metric Equivalent | Recommended Screw Length |
|---|---|---|
| 1/2" | 12mm – 13mm | 1" (25mm) |
| 5/8" | 15mm – 16mm | 1-1/4" (32mm) |
| 3/4" (Standard Plywood/1x) | 18mm – 19mm | 1-1/4" (32mm) |
| 7/8" to 1" | 22mm – 25mm | 1-1/2" (38mm) |
| 1-1/2" (2x4 Dimensional Lumber) | 38mm | 2-1/2" (64mm) |
-
Clamp Mating Boards Firmly: Always use a face clamp across the joint seam before driving screws. This counteracts the screw's natural tendency to push the mating board out of alignment.
-
Choose the Right Thread Type: Use coarse-thread screws for softwoods (like pine or fir) and plywood; use fine-thread screws for dense hardwoods (like oak, maple, or walnut) to prevent wood splitting.
-
Don't Skip the Wood Glue: While screws supply immediate mechanical clamping, applying a thin bead of PVA wood glue to the mating faces ensures maximum long-term joint durability.
Conclusion
The pocket hole joint has revolutionized modern cabinet making and home DIY projects. By combining exceptional speed with reliable mechanical holding power, mastering how to make pocket holes empowers woodworkers of all skill levels to construct sturdy, professional-grade furniture in a fraction of the time required by traditional methods.