
The mortise and tenon joint is the backbone of traditional woodworking. From ancient temples to modern chairs, this connection is synonymous with strength and longevity. But what is a mortise and tenon joint exactly? In this guide, we will explore how does a mortise and tenon joint work, break down the essential types, and walk you through the steps to create this legendary connection yourself.
What Is a Mortise and Tenon Joint?

*AI-generated illustration
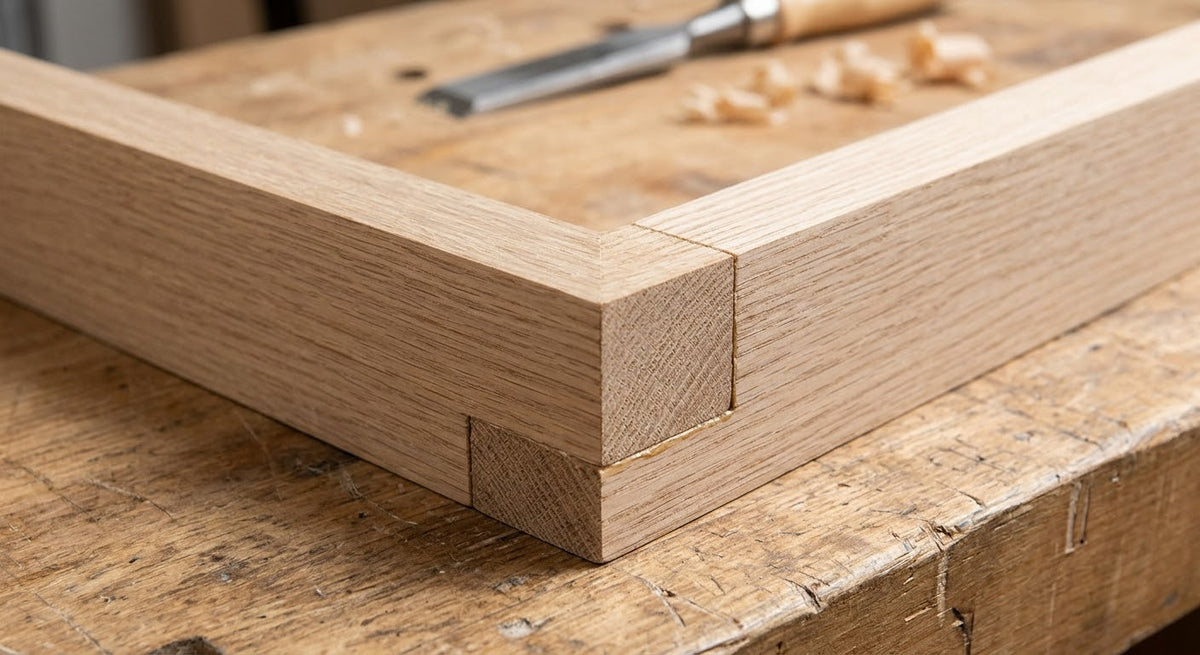
Often hailed as the "King of Joints," the mortise and tenon joint is the global standard for connecting wood at a 90-degree angle where strength is paramount. From heavy timber barns to fine dining chairs, it stands the test of time.
So, what is a mortise and tenon joint exactly? It consists of two mating parts:
- The Mortise: A square or rectangular cavity cut into one piece of wood.
- The Tenon: A projecting tongue cut on the end of the second piece.
The tenon is shaped to fit snugly inside the mortise. Once glued, this creates a massive surface area for bonding and a rigid structural lock that resists twisting far better than screws or biscuits.
Key Characteristics
| Feature | Description |
|---|---|
| Ease of Construction | Low. Requires precise measuring and fitting; challenging for beginners without power tools. |
| Joint Strength | Very High. The strongest standard joint for woodworking; handles twisting and heavy weight easily. |
| Versatility | High. Used in everything from delicate jewelry boxes to massive building frames. |
💡 Not Sure Which Joint to Use?
The Mortise and Tenon is an advanced joint. See how it compares to other common woodworking connections:
- Butt Joint Guide: The simplest connection, ideal for basic framing.
- Rabbet Joint Guide: A step up from the butt joint, great for drawers and boxes.
Advantages and Disadvantages
Advantages
✅ Superior Strength: The best choice for resisting twisting and heavy structural loads.
✅ Massive Glue Area: "Long-grain to long-grain" contact creates a nearly unbreakable chemical bond.
✅ Aesthetic Appeal: Variations like through-tenons allow you to show off craftsmanship.
Disadvantages
❌ High Skill Level: Requires precise fitting; a loose tenon significantly weakens the joint.
❌ Time-Consuming: Cutting square holes takes far longer than drilling round holes for dowels.
❌ Tool Intensive: Often requires chisels, hand saws, or specialized mortising machines.
How Does a Mortise and Tenon Joint Work?
To understand how does a mortise and tenon joint work, you have to look beyond just the glue. This joint succeeds because it combines mechanical locking with a massive chemical bond.
Here is the breakdown of the mechanics:
1. Mechanical Locking (The Shoulders)
The most overlooked part of the joint is the "shoulder." This is the flat, square cut at the base of the tenon. When the joint is assembled, these shoulders press firmly against the face of the mortised wood. This creates a wide base of support that acts like a brace. It prevents the joint from racking (wobbling side-to-side) even under heavy stress.
2. Maximum Glue Surface (The Cheeks)
The flat sides of the tenon are called "cheeks." When inserted into the mortise, these cheeks make contact with the side walls of the hole. This creates a large surface area of "long grain to long grain" wood contact. Since long grain absorbs glue perfectly, this bond becomes incredibly strong—often stronger than the wood itself.
3. Prevention of Rotation
Because the tenon is square or rectangular, it physically cannot rotate inside the mortise. Unlike a round dowel which might twist loose over time, a mortise and tenon remains rigid and square for decades.
Types of Mortise and Tenon Joints
While the basic concept remains the same, woodworkers have developed several variations to tackle specific structural challenges.
Here is a quick guide to the four most common types:
| Joint Type | Description | Best Application |
|---|---|---|
| Blind (Stopped) | The mortise is cut only partway into the wood. The joint is completely invisible once assembled. | Table legs, chairs, and standard cabinetry where a clean look is desired. |
| Through | The mortise is cut all the way through, and the tenon is visible on the other side. | Arts and Crafts furniture and heavy timber framing where visible joinery is a feature. |
| Wedged | A through-tenon that is locked in place by driving small wooden wedges into the end of the tenon. | High-stress joints that need to last for centuries without relying solely on glue. |
| Haunched | A standard tenon with a shortened "step" at the base to fill the groove in a frame. | Door frames and table aprons where a groove runs along the edge for a panel. |
When to Use Mortise and Tenon Joints?
Because of its unmatched strength, the mortise and tenon is the default choice whenever a project needs to support weight or withstand daily abuse. If you are building something that people will sit on, sleep on, or open and close repeatedly, this is the joint to use.
Here are the most common applications:
1. Tables and Chairs (Leg-and-Apron)
This is the classic application. When connecting the horizontal rails (aprons) to the vertical legs of a table or chair, the joint must resist "racking" (wobbling side-to-side). The mortise and tenon locks the legs square, ensuring the furniture remains rigid even when someone leans heavily on it.
2. Door and Window Frames
Doors are heavy and hang from one side, causing gravity to constantly pull them out of square (sagging). A haunched mortise and tenon is essential here. It prevents the frame from twisting and holds the heavy glass or solid wood panel securely in place for decades of opening and closing.
3. Timber Framing (Beams and Posts)
Before steel brackets existed, houses and barns were built using massive mortise and tenon joints. Today, it remains the standard for heavy timber construction, such as pergolas, gazebos, and timber-frame homes, where beams must carry significant structural loads.
4. Cabinet Doors
For high-quality cabinetry, especially larger pantry doors or wardrobe fronts, simple cope-and-stick router joints might not be strong enough. A true mortise and tenon adds the durability needed to prevent the door joints from cracking over time.
How to Make a Mortise and Tenon Joint?
While there are many ways to cut this joint—from hand chisels to massive industrial machines—the fundamental process remains the same. Precision in layout is more important than the specific tool you use.
Essential Tools
- Mortise Gauge: A specialized marking tool with two pins that scribes parallel lines for the mortise and tenon simultaneously, ensuring they match perfectly.
- Chisels & Mallet: Essential for squaring up the corners of the mortise and shaving the tenon for a perfect fit.
- Saw: A Tenon saw (hand) or a Table Saw (power) for cutting the cheeks and shoulders.
- Drill or Router: Used to remove the bulk of the waste material from the mortise hole.
The Golden Rule: "Mortise First"
Always cut the mortise (the hole) first. It is much easier to shave a tenon down to fit a fixed hole than it is to try and enlarge a hole to fit a fixed tenon.
Step-by-Step Guide
Step 1: Mark the Layout
Use your mortise gauge to scribe the width of the joint onto both pieces of wood. Ensure you reference the gauge from the "face side" (the visible side) of both boards to keep everything aligned.
Step 2: Cut the Mortise
Remove the waste wood from the mortise area. You can drill a series of holes using a drill press or use a plunge router. Once the bulk of the wood is gone, use a sharp chisel to square up the corners and flatten the walls.
Step 3: Cut the Tenon
Cut the Tenon: Set your saw to cut the "cheeks" (the flat sides) and the "shoulders" (the stop cuts). Cut slightly outside your layout lines—it is better to have a tenon that is too fat than one that is too loose.
Step 4: Test and Fine-Tune
Try to insert the tenon. It likely won't fit yet. Use a chisel or file to gently shave thin layers off the cheeks. You are aiming for a "Piston Fit," where the tenon slides in smoothly with friction but doesn't fall out when turned upside down.
Step 5: Glue and Clamp
Apply glue to the cheeks of the tenon and the walls of the mortise (avoid too much glue on the bottom, or hydraulic pressure will stop the joint from closing). Assemble the joint, check for square, and clamp tight.
Conclusion
While it requires more skill and patience than using screws or dowels, mastering the mortise and tenon joint elevates your woodworking to a professional level. Its unmatched ability to resist twisting and heavy loads makes it the "King of Joints" for a reason. By understanding the mechanics and practicing the "mortise first" rule, you can build furniture that will truly last for generations.